Fix The TWSBI ECO Cap Falling Off The Tail
Introduction
After cleaning and reassembling my TWSBI ECO for the first time, I found that the cap wouldn’t stay on the tail while writing. It was very loose and would fall off easily. If you find yourself struggling with the same problem you’ll learn how to fix it in this article.
If you’d like to watch me perform this fix, check out the video I made on this topic. Otherwise read on for the tutorial.
The Problem
It turns out that proper assembly of the pen isn’t intuitive. Like me, you might be tempted to insert the Plunger into the body first, followed by the rest of the parts. Everything would go fine until you try to prop the pen cap on the tail - it won’t stay on. You’ll find that the Plunger will fully retract before the Tailcap can snug up, leading to a gap between the Tailcap and the Body.
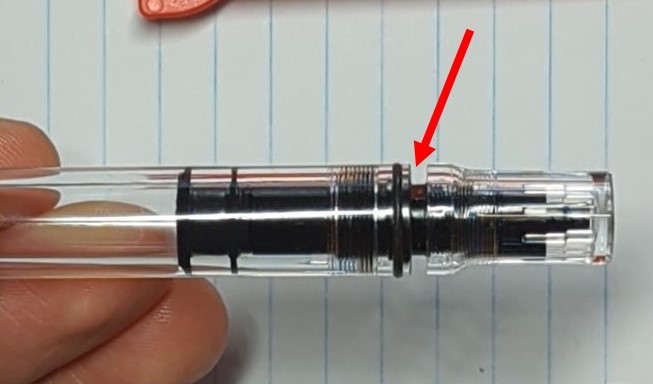
This gap prevents the cap from making contact with the o-ring that holds it when you place it on the tail. Without the snug seal of the o-ring, the cap sits loosely and will fall off during writing.
The Solution
To fix this, you’ll need to reassemble your pen in the proper order. I recommend draining and rinsing your pen of ink, otherwise things will get pretty messy.
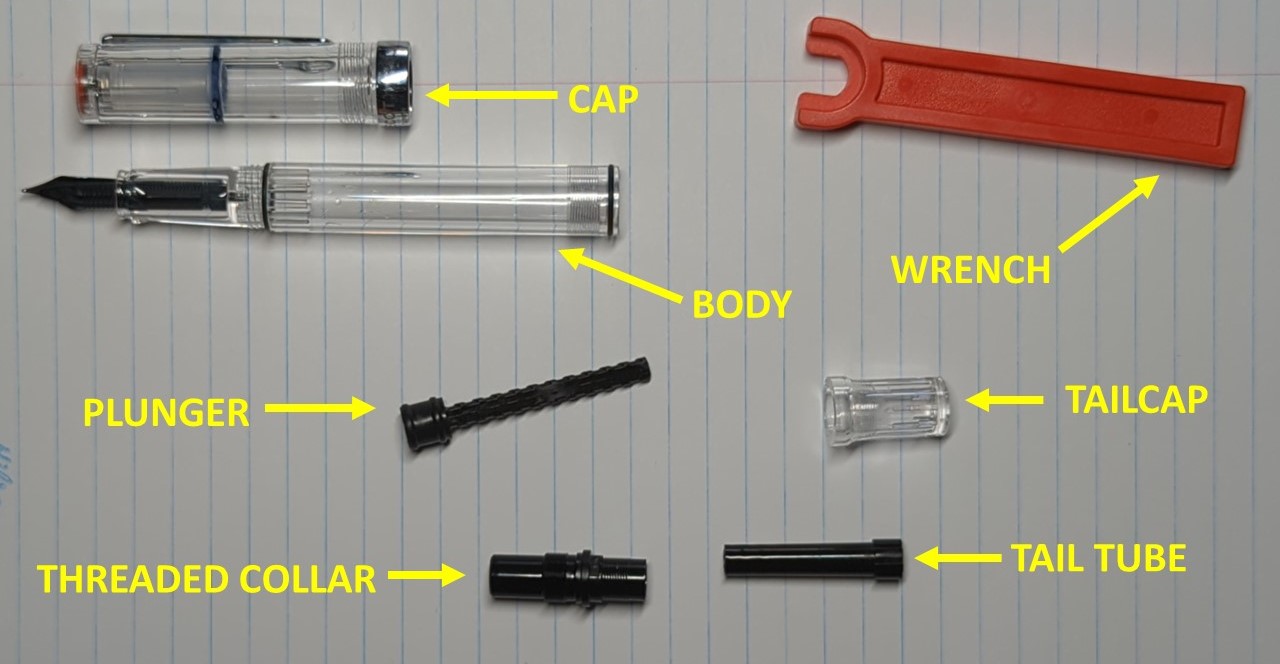
Insert the red TWSBI wrench into the gap between the Tailcap and the Body. If the gap isn’t big enough, turn the Tailcap counterclockwise to extend the Plunger. Turn the wrench clockwise until the Threaded Collar and Plunger assembly can be removed.
The trick to properly reassembling the pen is to put together the Plunger/Collar/Tailcap mechanism first. Begin by inserting the Tail Tube into the Threaded Collar. Next, place the Tailcap over top of the Tail Tube and screw it in about halfway. It doesn’t have to be exact - we’ll probably need to come back and make adjustments shortly.
Insert the Plunger into the other end of the Threaded Collar. Begin retracting the Plunger by rotating the Tailcap. If you’re lucky, the Plunger will be fully retracted at the same time that the Tailcap becomes tight against the Collar. This would give you the perfect fit after reassembling. If either the Plunger or the Tailcap still had a gap when the other became tight, you’ll need to make an adjustment.
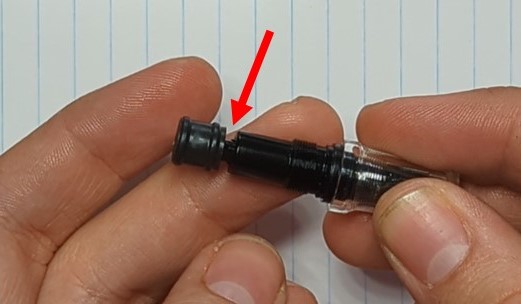
Take note of where the gap was, and then extend the Plunger and carefully remove it. If the Plunger had a gap while the Tailcap was tight, you’ll need to loosen the Tailcap a few turns. If the Tailcap had a gap while the Plunger was tight, you’ll need to tighten the Tailcap a few turns. Once done, carefully re-insert the Plunger and test again.
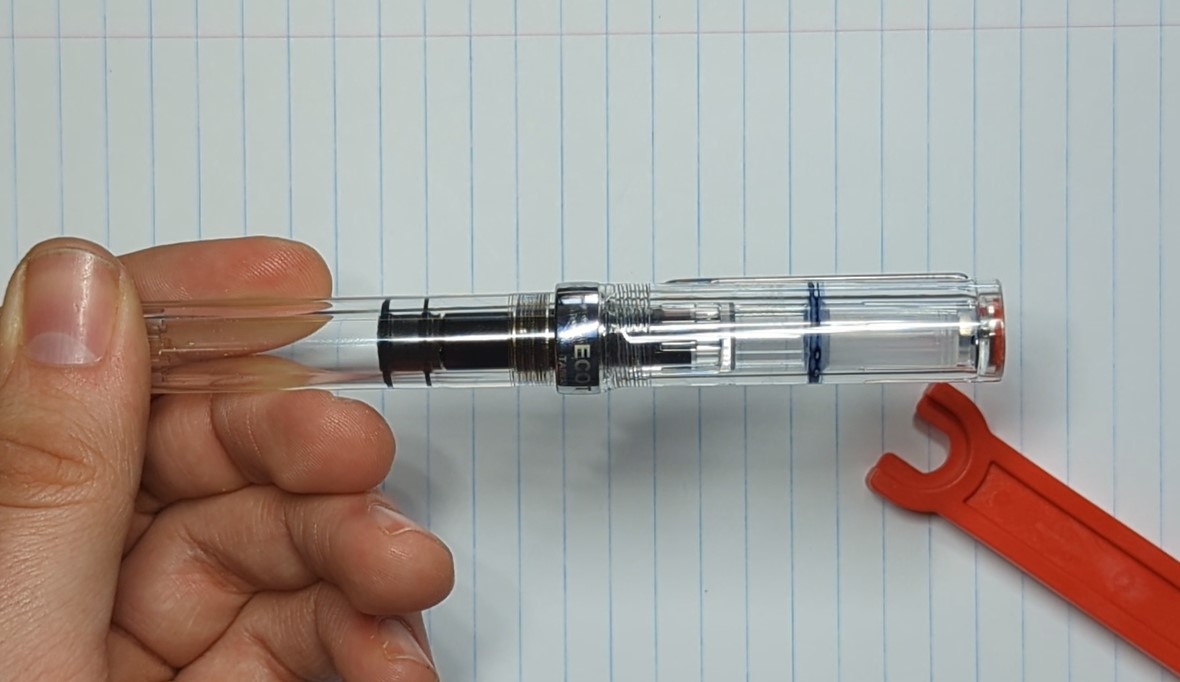
Once you are happy with the fit, extend the Plunger just enough to give you enough room to fit the red wrench between the Collar and the Tailcap. You can apply a few drops of grease (supplied with your pen) to the Plunger seal if you’d like. Insert the Plunger assembly into the Body. Hold the Body and turn the wrench counter-clockwise until it is snug (be careful not to over-tighten).
If all went well, you should be able to fully retract the Plunger, and the cap should stay on the tail firmly.
@mastodon.online
@MKafarowski