BIC Pencils as Pivots for 3D Printed Parts
I’m working on a 3D printed project that requires rotational motion. With purely 3D printed parts, options for creating smooth rotation are limited. Layer lines and print orientation limit the strength and smoothness of a pivot. Ball bearings can be integrated into a printed part but are large and expensive. Simple materials like toothpicks may not rotate easily or can be weak.
A simple and cost-effective solution I discovered is to use the parts from a BIC mechanical pencil. You can buy these for cents, but you probably have dozens just lying around!
Each pencil can make two pivots - one made of the inner and outer body tubes, and another out of the components that make up the nose mechanism. These pieces are made of glossy plastic and slide very smoothly on each other. You can easily press-fit or glue the parts into a 3d printed model.
Dismantle the pencil by pulling off the front cap. Carefully snip off the flange keeping the black collar in place (the flange pieces like to fly off at high speed so protect your eyes). The little spring isn’t used here, but they can come in handy for other projects.
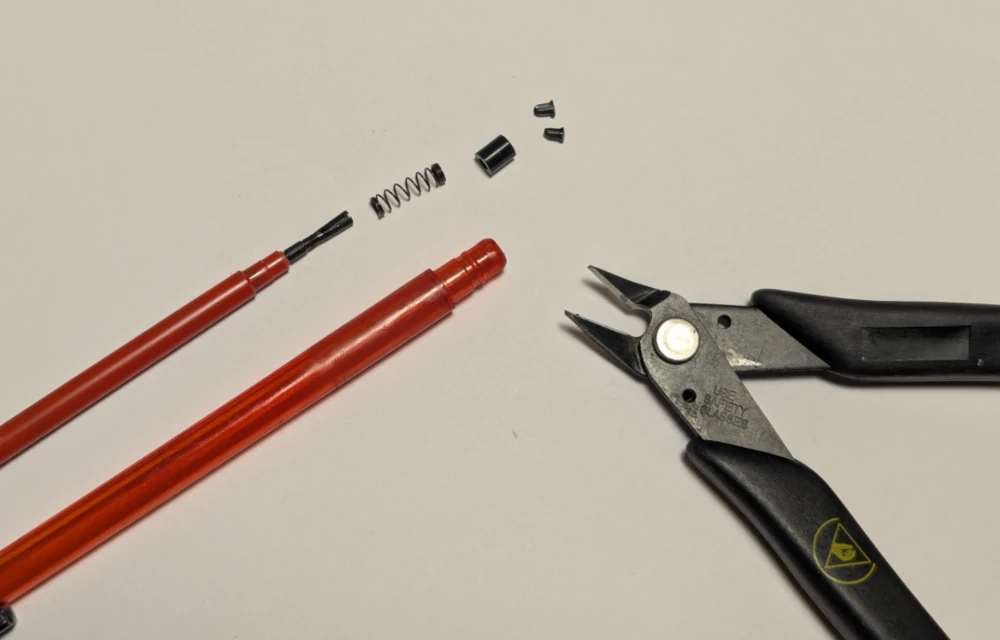
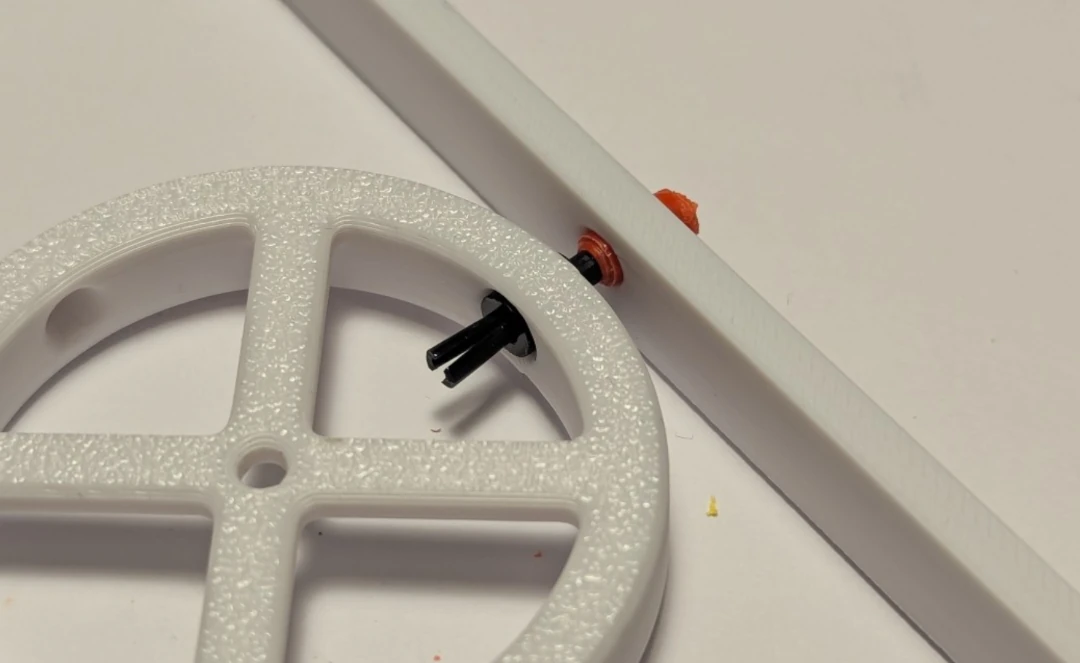
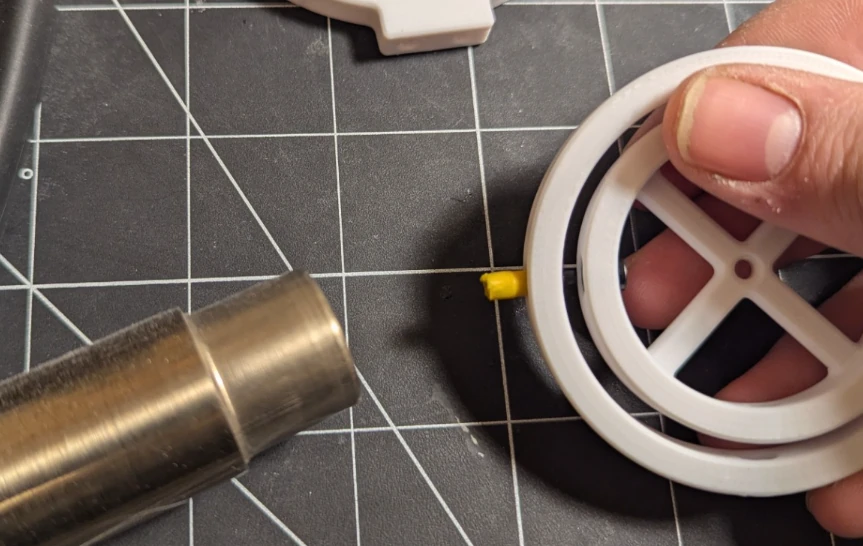
You can use the black collar and the remaining piece of the tip of the pencil as a small pivot. Despite its size, it’s surprisingly strong. The black collar has been press fit into the round piece, and the tip was cut off the pencil and press fit into the long piece.
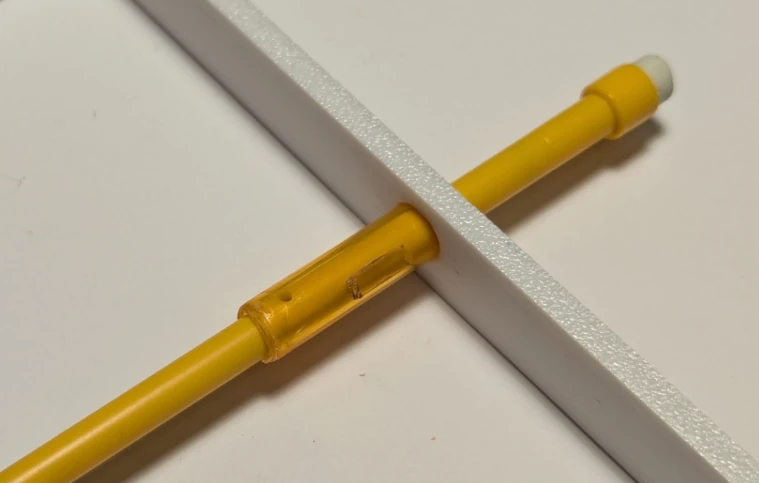
You can also use the inner and outer body pieces as a larger pivot for both rotational and linear motion. Cutting can be done with a saw, or with strong scissors or flush cutters. If using a pinching tool, you may need to reform the cut outer cylinder before the inner will rotate smoothly.
When press-fitting into a part, you may wish to heat the print slightly first to allow it to conform easier, otherwise you risk the insertion force causing cracks or separation of the layers. Here I use a hot air station set to 100°C. The glass transition (softening) temperature of PLA is around 60°C, so the air hitting the part only needs to be warm, just bordering on hot.
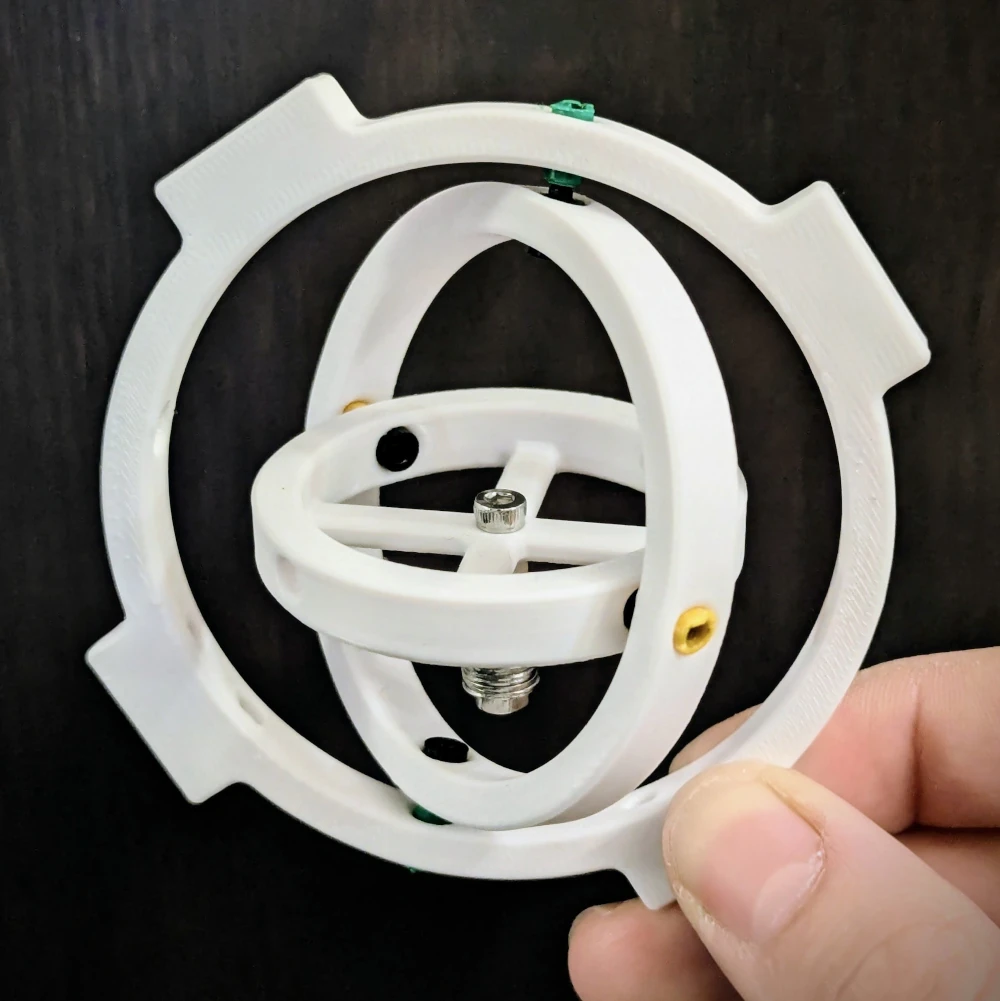
I created the nested gimbal ring you saw above as a demonstration model, which you can download for free on Printables. A small M3 screw with a weight on the end is attached to the center ring, and will always remain parallel to the ground as the outer ring is rotated around it. The pivots allow for smooth operation even with an extremely light balancing weight thanks to their low friction.
I also designed this marble labyrinth game which uses the small and large BIC pivots! It is also available for download on Printables. I’ve submitted it to the Balancing Games contest, so give it a like, download and make if you enjoyed it!
Hope you find this trick useful! I haven’t seen this published anywhere else online. Try it out in on your own 3D printed projects and let me know what you make!